License Activation
The first time you run Duplicacy, it will ask you to activate the license or start a fully functional 30-day trial period:
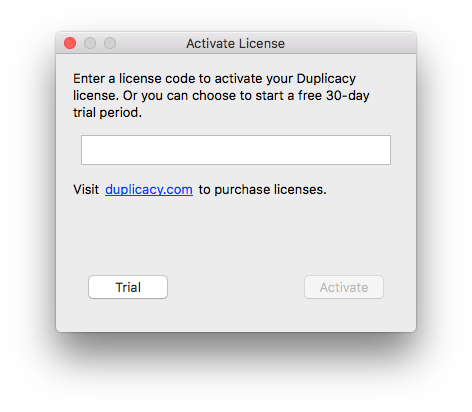
Licenses can be purchased from our customer page (signup is required). There are two types of Duplicacy licenses: A personal license can only be installed on home computers, and can only be used to back up personal documents that are not related to for-profit activities. A commercial license has no restrictions and can be installed on any computer to back up any files.
Repository Setup
Once the appropriate license has been selected, Duplicacy will present the main window with an empty backup job:
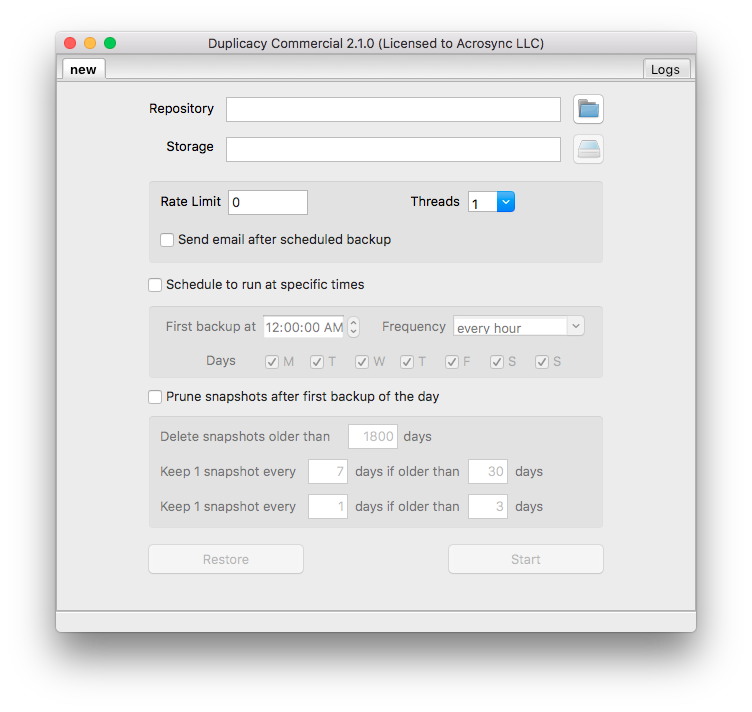

To configure a backup job, the first thing is to select the local directory to be backed up. This directory is called repository in our terminology. Click the button next to the text input used to display the repository, and the repository setup dialog will appear:

With this dialog, you can click the Choose... button to select the repository. If you intend to back up everything in the the repository, click the Save and you can jump to the next section on storage setup. Otherwise, you can add exclude/include patterns so that only certain files or directories will be backed up.
To exclude a directory, click the Exclude a directory button and select the directory to be excluded. For more complicated include/exclude patterns, click the Include/exclude button and enter one pattern at a time. Here are rules for specifying the include/exclude patterns:
- An include pattern starts with +, and an exclude pattern starts with -
- Patterns can contain wildcards such as * and ?, as well as the path separator /
- The path separator on Windows is / (not the usual \)
- Patterns ending with / are applied to directories only, so -path1/ will exclude the directory named path1, but not the file with the same name
- For each file or directory, the list of supplied patterns are checked one by one in the given order. If a match is found, the corresponding include or exclude action is taken, skipping all remaining patterns. Therefore, the order in which patterns are added is significant
For instance, if you want to exclude all *.log files except the ones under the dir1 directory, the patterns should be +dir1/*.log and -*.log, in that order.
Storage Selection
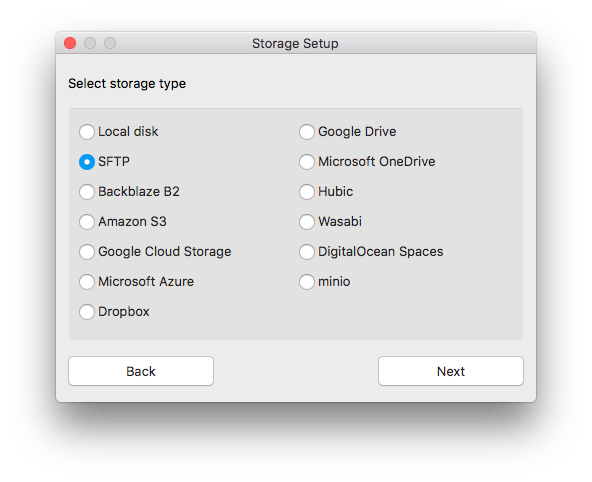
After selecting the repository to be backed up, you need to decide where the backup should be stored. Being a cloud backup tool, Duplicacy supports many major cloud storage providers (and even more are coming), but you can also use local disks or any SFTP servers (such as a Mac or Linux computer, or a NAS box):
Local disk
If you decide to use a local disk for the storage, you just need to select a directory using the system default dialog.
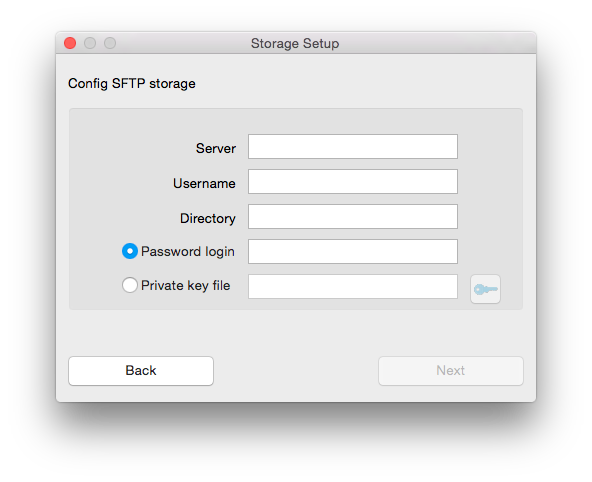
SFTP
For the SFTP storage, the server address, the username, and the remote directory must be specified. If a customer port other than the default 22 is used, enter the server address in the format of host:port. If the SFTP server supports password login, the password used to log into the server must be supplied. If public key authentication is required, you can click the button next to the private key file text field to select the private key file (which cannot have a blank passphrase due to a limitation of the underlying go SSH library).
Backblaze B2
For the Backblaze B2 storage, the bucket name, the account id, and the application key must be provided.
The Backblaze B2 storage is currently the only storage that supports multithreaded uploading. Once the storage is chosen, a combobox on the configuration page will become visible to allow you to select the number of uploading threads.
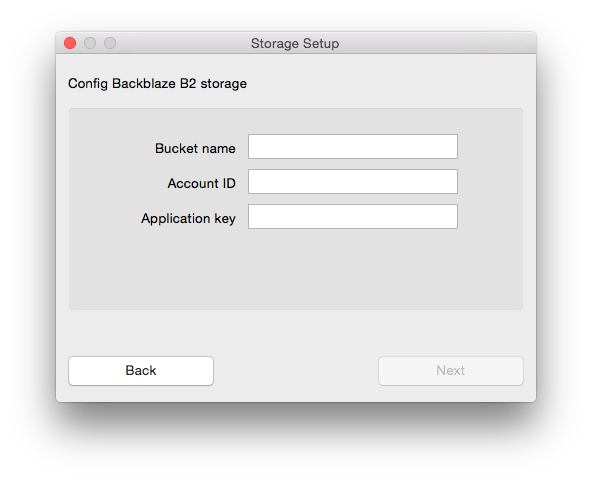
Please note that if you back up multiple repositories to the same B2 bucket, the lifecyle rules of the bucket is recommended to be set to Keep all versions of the file which is the default one. The Keep prior versions for this number of days option will work too if the number of days is more than 7.
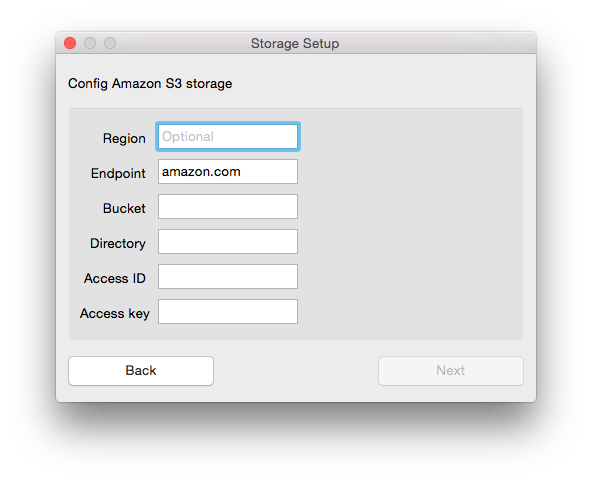
Amazon S3
To use the Amazon S3 storage, you must first specify the bucket name. The directory is optional. The access key and the secret key must also be provided.
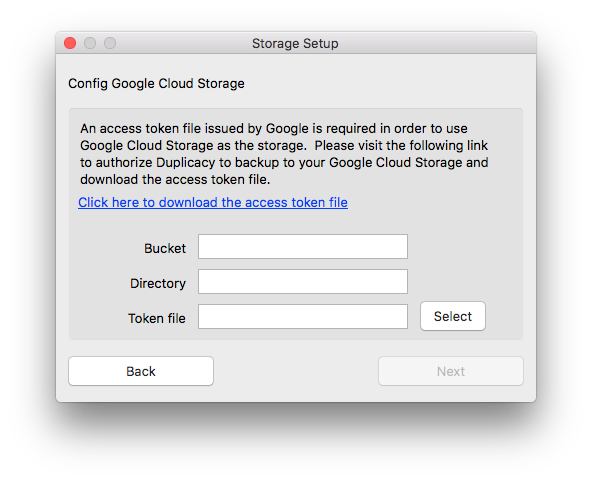
Google Cloud Storage
An access token file issued by Google is needed to access Google Cloud Storage. The access token file can be obtained by granting Duplicacy the required permissions to access your Google Cloud Storage files, or by downloading a service account credential file directly from Google.
Microsoft Azure
For the Azure storage, enter the container name and the access key.

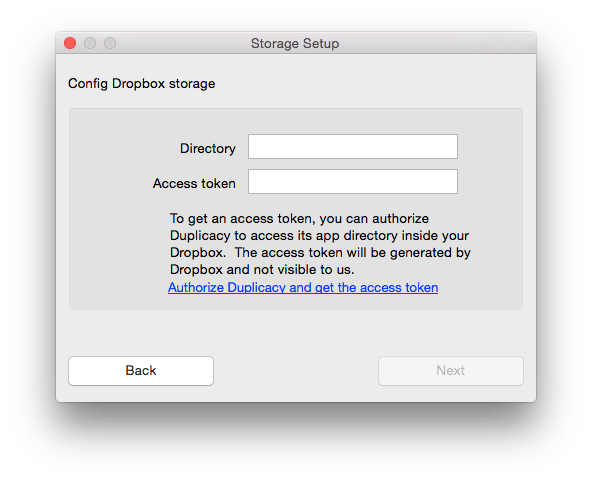
Dropbox
To use Dropbox as the storage, enter a directory name and the access token. You can obtain the access token by authorizing Duplicacy to access its app folder inside your Dropbox. Note that the access token obtained this way is not visible to us.
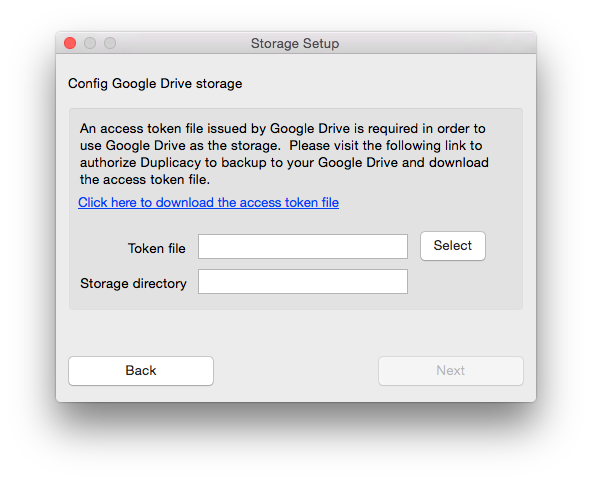
Google Drive
To use Google Drive as the storage, you must acquire an access token file by authorizing Duplicacy to back up to your Google Drive. After the access token has been downloaded to your computer, enter the local path where the access token file is stored, as well as the directory in your Google Drive used as the storage.
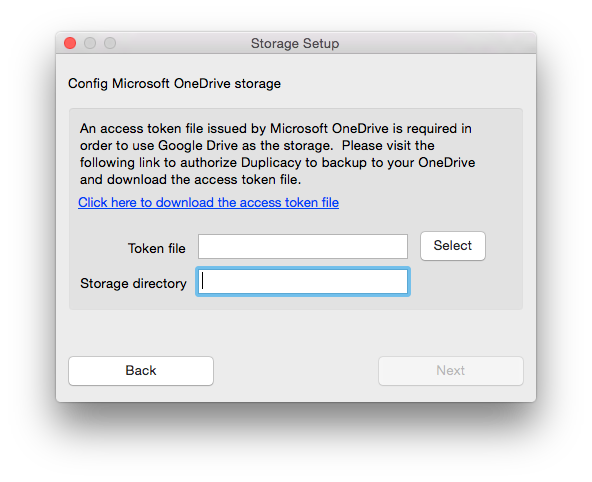
Microsoft OneDrive
To use Microsoft OneDrive as the storage, you must acquire an access token file by authorizing Duplicacy to back up to your OneDrive. After the access token has been downloaded to your computer, enter the local path where the access token file is stored, as well as the directory in your OneDrive used as the storage.
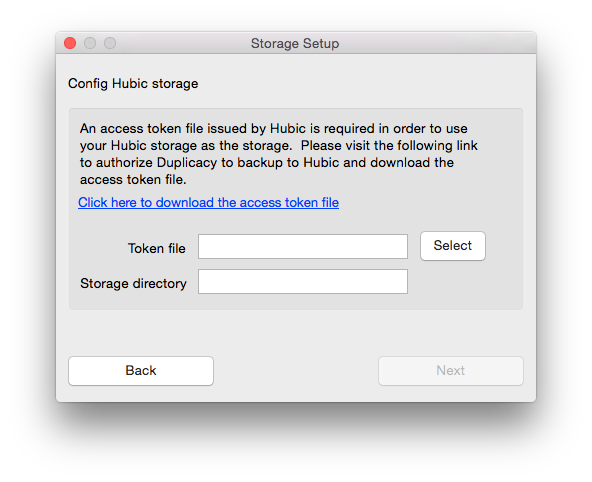
Hubic
To use Hubic as the storage, you must acquire an access token file by authorizing Duplicacy to back up to your Hubic stroage. After the access token has been downloaded to your computer, enter the local path where the access token file is stored, as well as the directory in your Hubic used as the storage.
Wasabi
Wasabi is a S3-compatible cloud storage service, so you will see a configuration page very similar to that of Amazon S3 with the region and endpoint automatically filled.

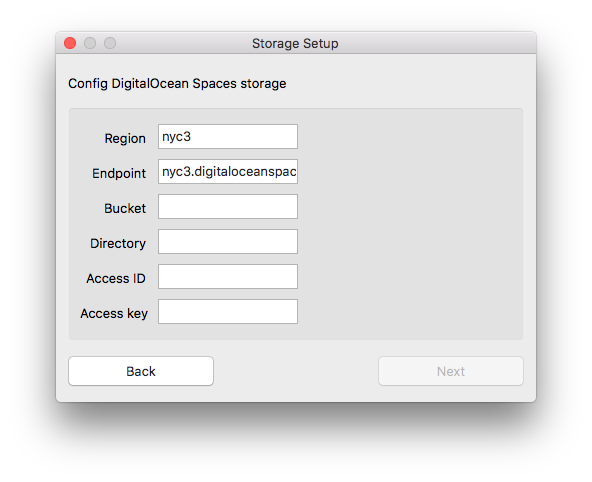
DigitalOcean Spaces
DigitalOcean Spaces is another S3-compatible cloud storage service.
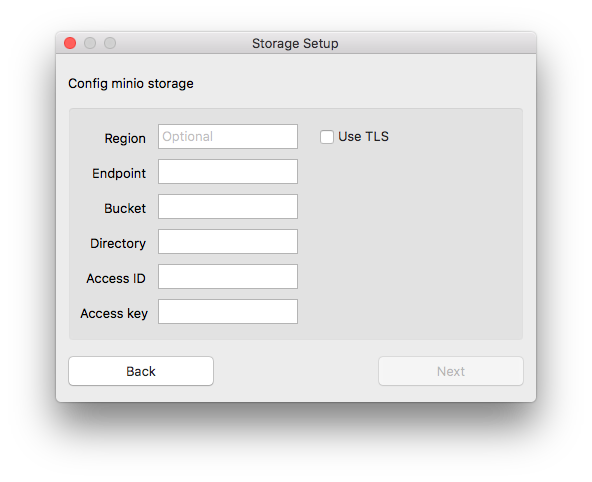
minio
The minio storage backend allows Duplicacy to back up to any public or private S3-compatible storage.
Repository ID and Encryption
As soon as the storage configuration is done, Duplicacy will first determine if the storage has already been initialized. If it has not, it will present this dialog to you:
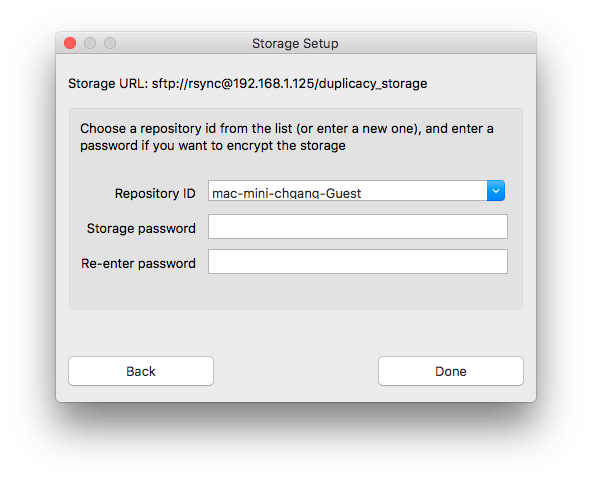
On this page, if you want to encrypt the storage, select a password and enter it twice. If you leave the password empty, the storage will not be encrypted, and anyone else who can access the storage can access your backups too.
On this dialog you can also select the repository id used to identify the repository. Duplicacy will generate a default one for you from the host name of the computer, the username, and the base of the repository directory. You can also enter a different one in the input box, or select another one that already exists in the storage (if the storage has already been initialized before).
If the storage has already been initialized without encryption, there won't be a password input:
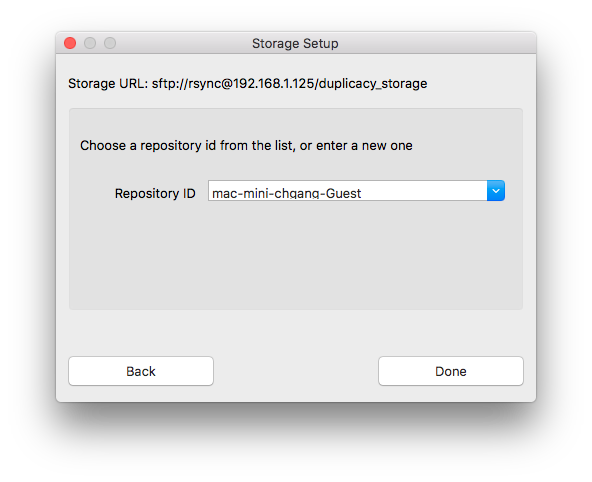
If the storage has already been initialized with encryption enabled, then you will also need to input the correct password.
Ready for Backup
After the storage is set up, you are now back at the main window, with the two text fields, Repository and Storage, properly populated. You can then decide if you need to limit the upload speed. If so, enter a number indicating the maximum upload speed (in kilobytes/sec) in the Rate Limit text field. If no throttling is required, you can leave the text field empty, or filled with a 0, both of which indicating that there is no rate limiting.
At this time you can start the backup operation manually by clicking the 'Start' button. However, if the Schedule to run at specific times checkbox is checked, Duplicacy will start the backup at the scheduled times, which are determined by the first backup time of the day, the backup frequency, and the selected days of the week. Please note that if the last backup time of the day has passed, the next backup will start on next day (if the corresponding day of the week is checked) at the time specified by the first backup time of the day (not the next time determined by the backup frequency).
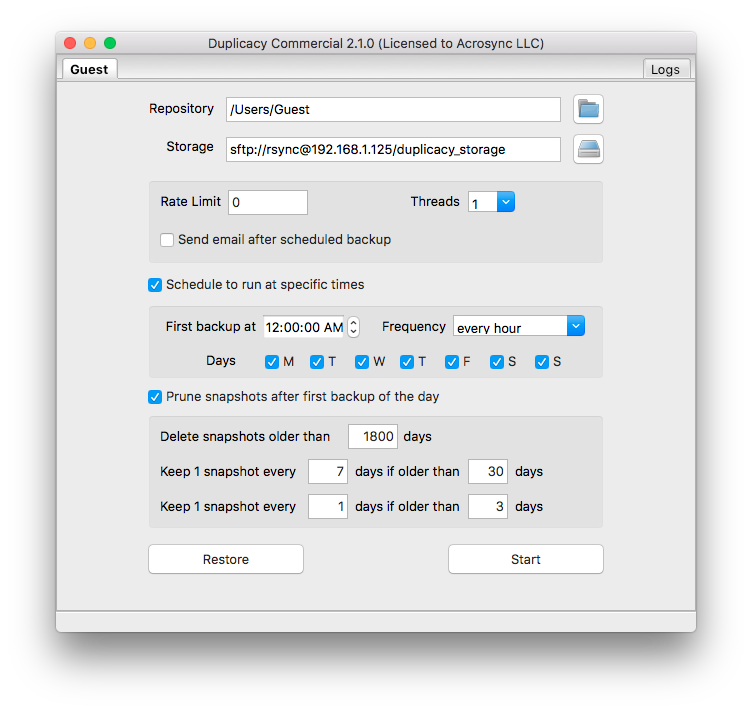
If the Prune snapshot after first backup checkbox is checked, Duplicacy will run the pruning operation after the first backup of the day or the manual backup. Please note that if there are multiple Duplicacy instances running on different computers that back up to the same storage, only one Duplicacy instance can have the pruning option enabled.
Other checkboxes allow you to set up email notifications after each backup finishes, or to set Duplicacy to automatically start when you log in. On Windows, you can also take advantage the Volume Shadow Copy service to properly back up files opened by other processes.
Restore
To restore a repository to a previous version, click the Restore button, you will be presented with the restore dialog:
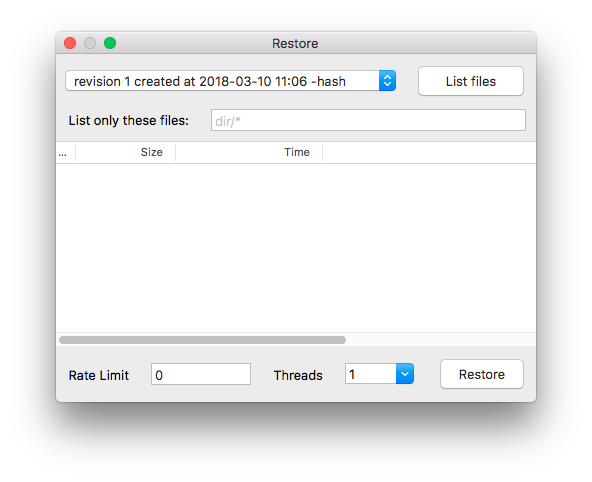
On the top left of the dialog is a dropdown box that lists all previous backups for the current repository. Each backup is identified by an increasing revision number. You can pick the revision to be restored and click the List files button to populate the file list:
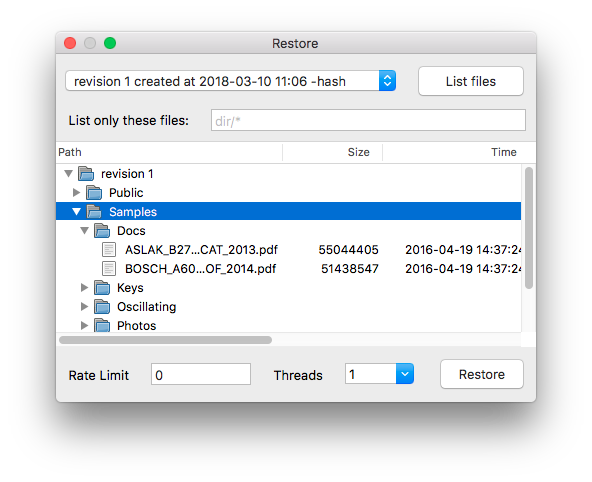
Right clicking the file or directory in the file list will bring up the restore action menu. There are two actions you can perform on each item in the file list. For a file there is a View action that can open the file in a text viewer. For a file or directory there is also a Restore action. You can also limit the download speed by entering the maximum kilobytes per second permitted into the Rate Limit text field, while a 0 indicates that no rate limiting is in place.
Restore to a different directory/computer
Duplicacy doesn't support restoring files directly to a directory outside of the repository. If you need to restore files to a different directory on the same computer, or to a new directory on a different computer, you must create a new repository using the destination directory, and the same storage, following instructions mentioned above, but remember to not use the default repository id automatically generated by Duplicacy. Rather, on the storage setup dialog, pick the id of the original repository from the dropdown list. Once the new repository has been properly configured with the correct repository id, you will be able to select files from the original repository to restore.Run as a Windows Service
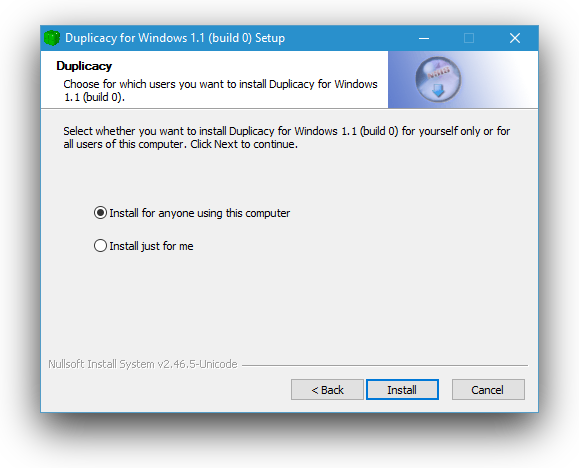
Duplicacy for Windows can be set up as a Windows service in order to run backups at scheduled time without a user logged in. To install Duplicacy as a service, run the installer with administrator rights, and there will be a dialog to let you choose from installing for all users or installing for the current user only:
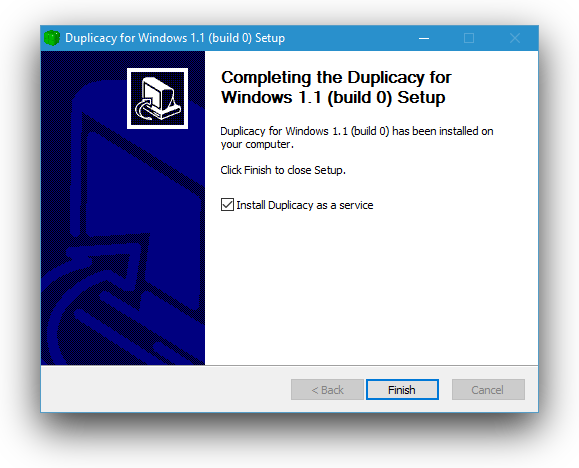
If you choose to install for all users, an option for installing the Duplicacy service will be provided before the end of the installation:
Alternatively, you can run the Duplicacy executable directly to install the service:
DuplicacyGUI64.exe -install
Once installed, you can run Duplicacy as administrator to set up the repository, storage, backup schedule, etc. After you exit the Acrosync program, the service will take over and run scheduled backups at the given times.
Note that if you run Duplicacy without elevated privileges you will be unable to control or configure the Duplicacy service. As a result, Duplicacy will not allow you to back up the same repository used by the service to avoid possible conflicts. If Duplicacy is already running without elevated privileges, you must also exit the current running instance by right clicking the system tray icon and selecting Quit. If you just close the Duplicacy window, it will remain running in the background, and when run Duplicacy as administrator, it will actually just bring to front the existing instance without elevated privileges.
Advanced Settings
Duplicacy provides a number of advanced settings that can be configured via user defaults on macOS and registry values on Windows. These settings are stored under com.acrosync.mac.duplicacy on macOS, or HKCU\Software\Duplicacy on Windows (or HKLM\Software\Duplicacy if Duplicacy is installed for all users).
The following lists the name of the user default or registry values for each setting. All registry values on Windows should be created as strings.ProxyServer
Duplicacy creates HTTPS connections when connecting to cloud storages. Occasionally, it also contacts our license server via HPPTS to update licenses. If you computer can't access the Internet directly and instead relies on a proxy server, you can set this setting in the format of https://server:port to point to your proxy server.
NoWakeUp (Windows only)
When Windows goes into sleep, Duplicacy will always attempt to wake up Windows on the next scheduled time. You can set this registry value to 1 to disable this behavior.
WakeUpDelay
By default when the computer just wakes up from a sleep, Duplicacy will wait 10 seconds before running an overdue backup. However, you can change the wait time to any value by changing this setting.
HideOnStart
If this setting is 1, Duplicacy will not show the main windows when it starts up.
License
This is where Duplicacy stores the license. You can delete this user default or registry value and run Duplicacy again to update the license. This is usefully when you need to move a license to a different computer or remove an expired license.