This is the user guide for Duplicacy Web Edition. The user guide for the old GUI version can be found here.
Installation
On Windows and macOS, Duplicacy Web Edition is provided as installers. Installation is needed before you can start the executable.
On Linux, Duplicacy Web Edition is provided as executables and no installation is required. You may move the downloaded executable to a directory pointed to by the environment variable PATH and rename it to a shorter name (such as dwe_main) for quick typing (please note that if the new name doesn't have the dwe_ prefix than it is treated as a customized version).
Setting up the Master Password
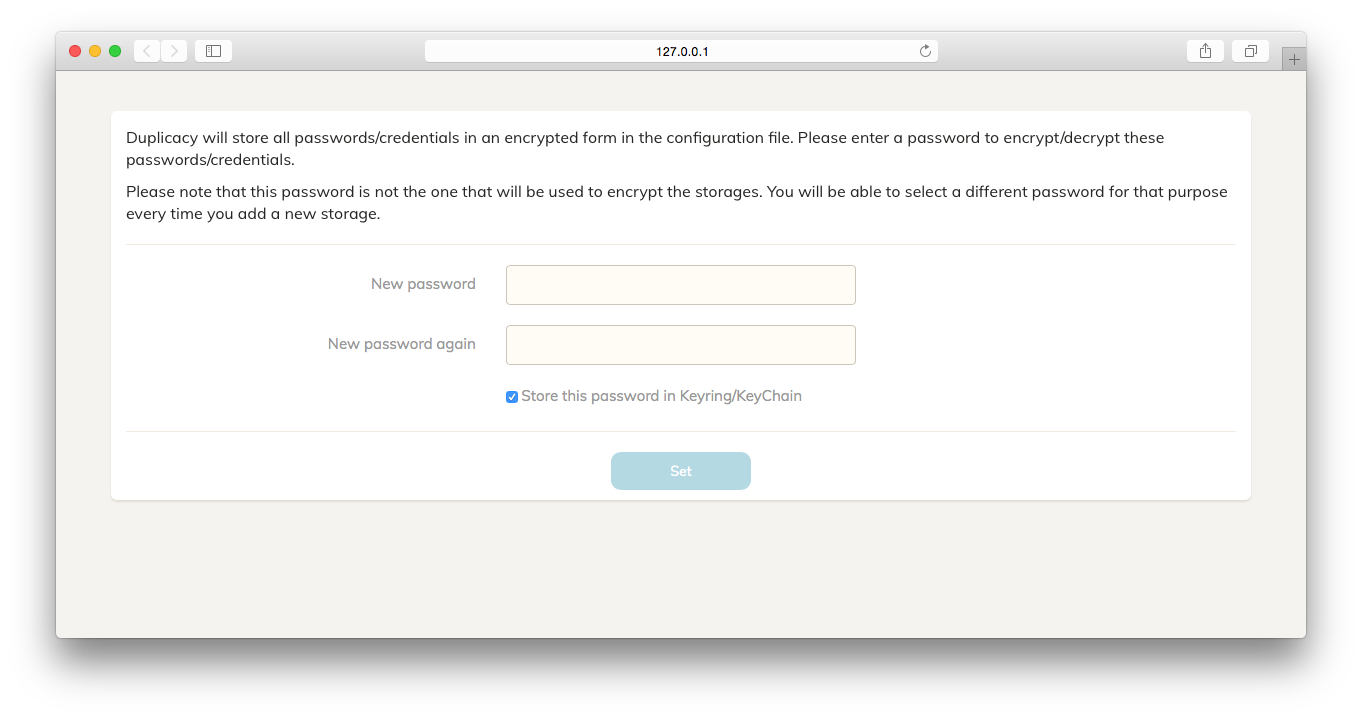
The first thing you need to do after you start Duplicacy Web Edition for the first time, is to choose a master password. As the following page indicates, this master password is used to encrypt all storage-related credentials which can then be stored safely in a configuration file. Duplicacy Web Edition will store the secure token derived from this password, instead of the password in plaintext, in the OS-specific password storage such as Keychain or Keyring. If such a password storage isn't available, Duplicacy Web Edition will ask you to enter this password on every restart.
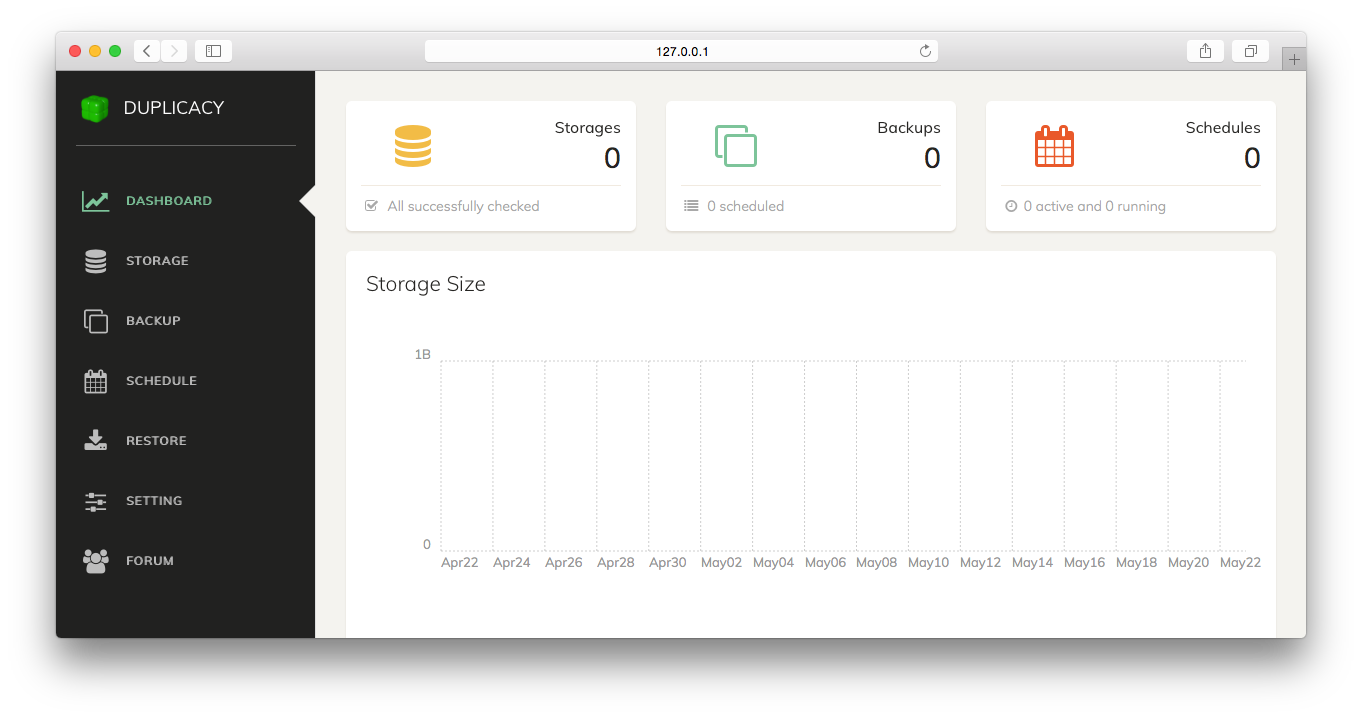
After you enter the master password, you will be presented with the dashboard page, which is basically a blank template at this time.
Adding a Storage
A storage is the destination that your backups will be stored to. To add a storage, click Storage in the navigation menu on the left and the following dialog will appear:

Here you can add different types of storages all supported by Duplicacy Web Edition. Using the disk-based storage as an example, you can enter the storage path directly, or click on the directory button next to the text input to invoke the directory selection dialog:
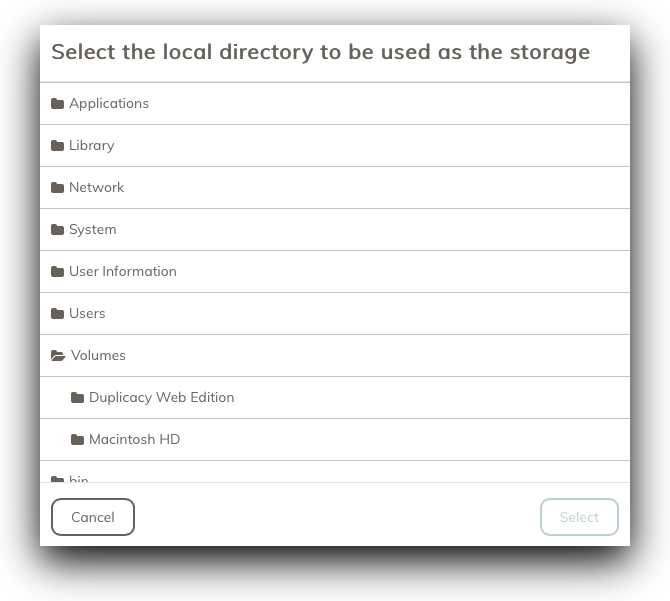
You can expand a directory by clicking the icon next to the directory name. Once you select a directory by clicking on any area in a row other than the directory icon, the Select button will become enabled, letting you select the highlighted directory and close the directory selection dialog. At this time, the directory text input will be automatically filled with the directory you just chose:
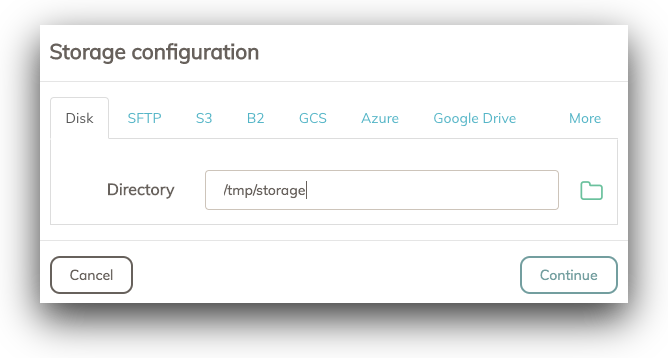
After you select (or manually enter) a directory as the storage, you can now click the Continue to move to the next step of storage configuration:
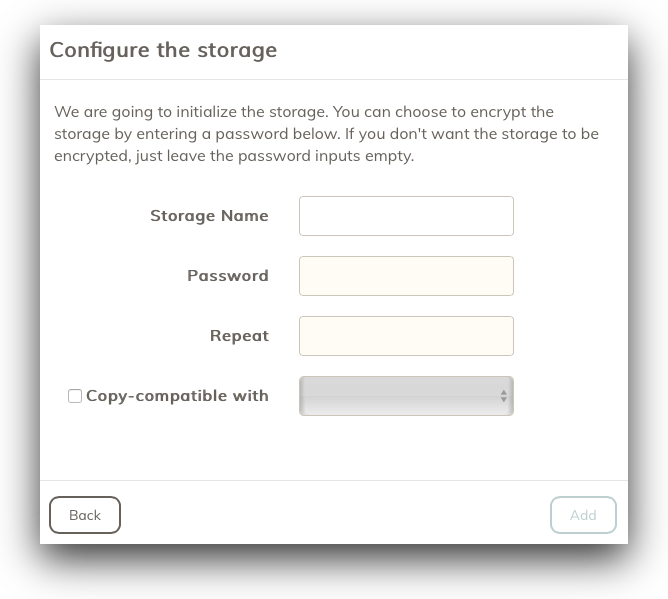
On this page, Duplicacy Web Edition will ask you for the name of the storage to be added. This storage name must be unique. Besides, if the storage has not been initialized before, it will also ask you for an optional password to encrypt the storage. It is strongly recommended to use an encryption password if the storage is on a cloud service. If you don't want to encrypt the storage, you can leave the password inputs empty.
The Copy-Compatible checkbox is for the copy operation -- the destination storage of a copy operation must be copy-compatible with the source storage.
Once you finish configuring the storage, click the Add button and Duplicacy Web Edition will run the Duplicacy CLI version to initialize the storage (if uninitialized). Afterwards, the Storage page will be updated with the newly added storage:
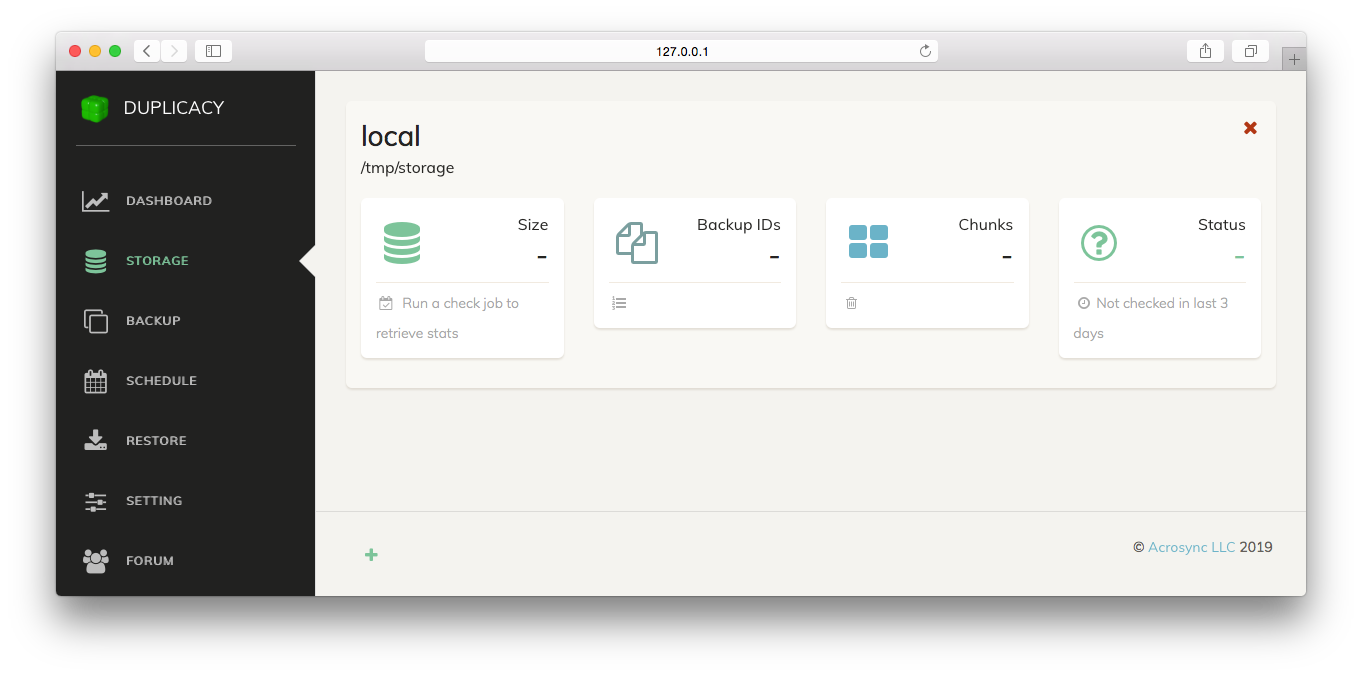
The newly added storage doesn't have any statistical information yet, which will become available after you add and run a Check job for this storage.
Adding a Backup
To add a backup, first switch to the Backup page:
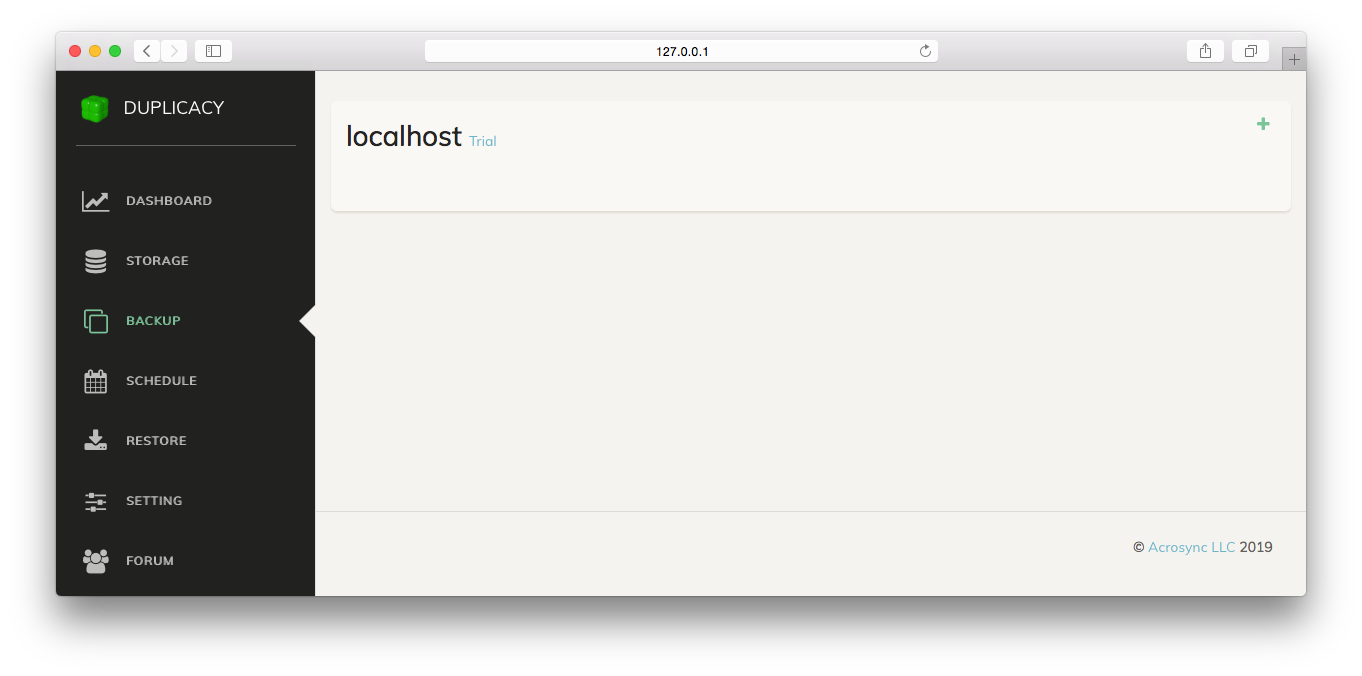
You'll notice the localhost label. This represents the local computer that Duplicacy Web Edition is currently running on. There is a Trial link next to it indicating that Duplicacy Web Edition has automatically downloaded a trial license. If you have a personal or commercial license you can click the Trial link and enter the license activation code to apply the license.
Click the green plus sign on the top right corner and this dialog will appear:
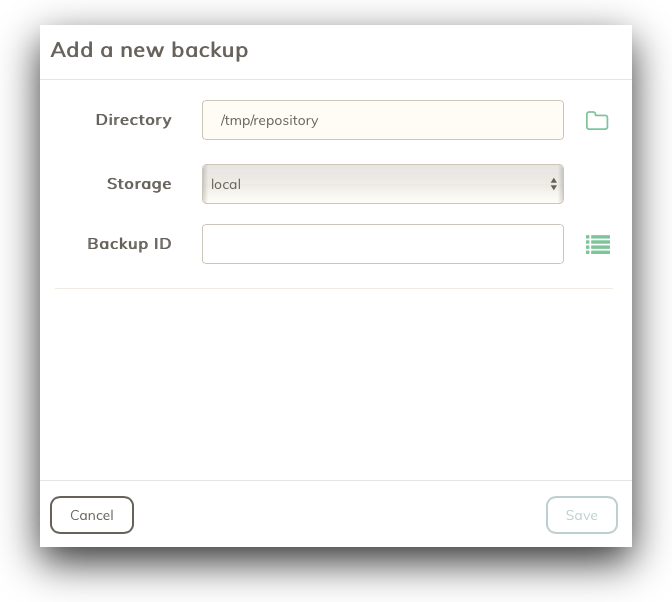
Here you can select the directory to back up, the storage to back up to, and the Backup ID. Duplicacy supports multiple computers backing up to
same storage (in order to exploit cross-computer deduplication), and on each computer you may have multiple directories. The Backup ID is used as the ID of the
backups created for each directory.
When you're creating a new backup, generally you'll need to select a unique Backup ID that is different from existing ones. You can find out what existing Backup IDs by
clicking the list button next to the Backup ID input. However, there are cases when you want to use an existing one. For example, when you need to restore a
directory on a different computer, you'll need to choose the original Backup ID that was used to create the backups for that directory. The following Backup page shows the new backup just added. You can click the Include/Exclude column to specify which files will be included in or excluded from the backup,
and the Options column to specify extra options for the backup operation. At this time you can manually run backups by clicking the triangle button at the bottom of each backup. However, to run the backup (or other operations) regularly, you'll
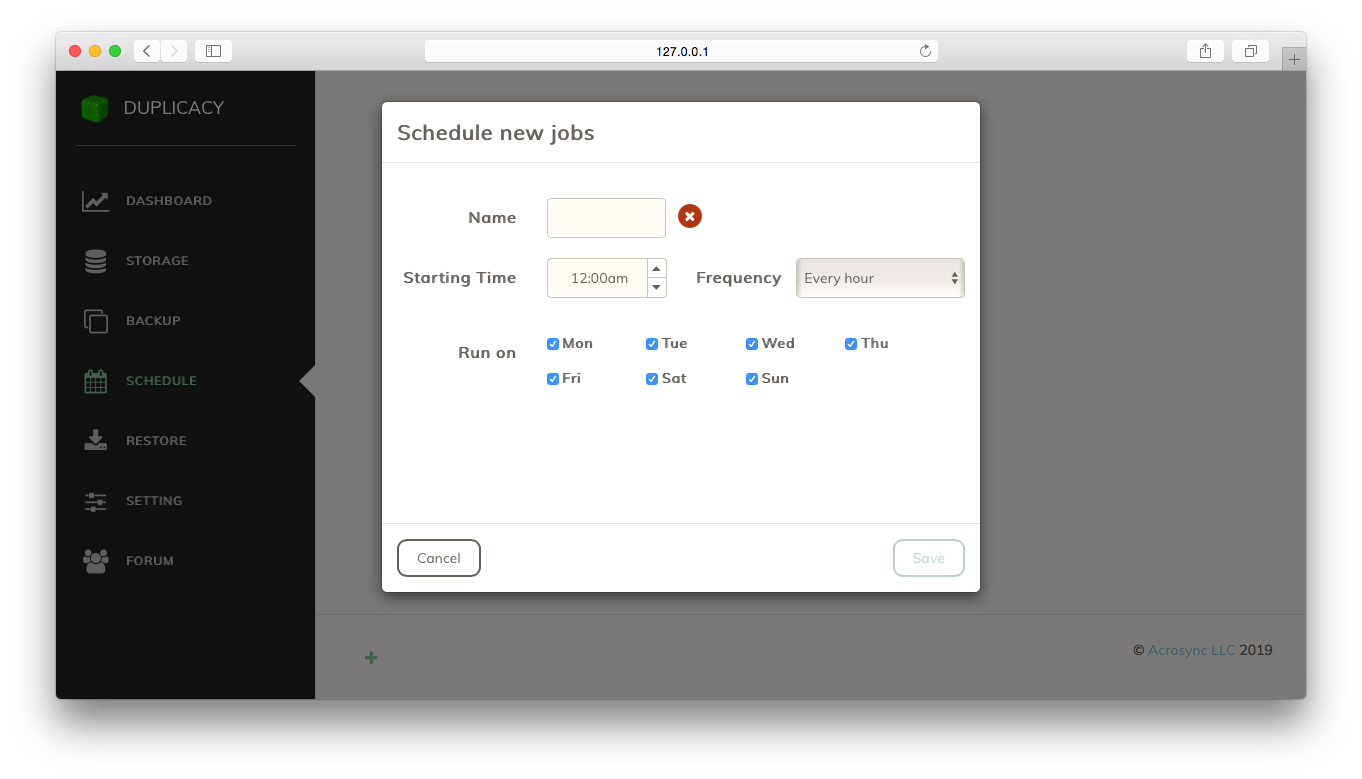
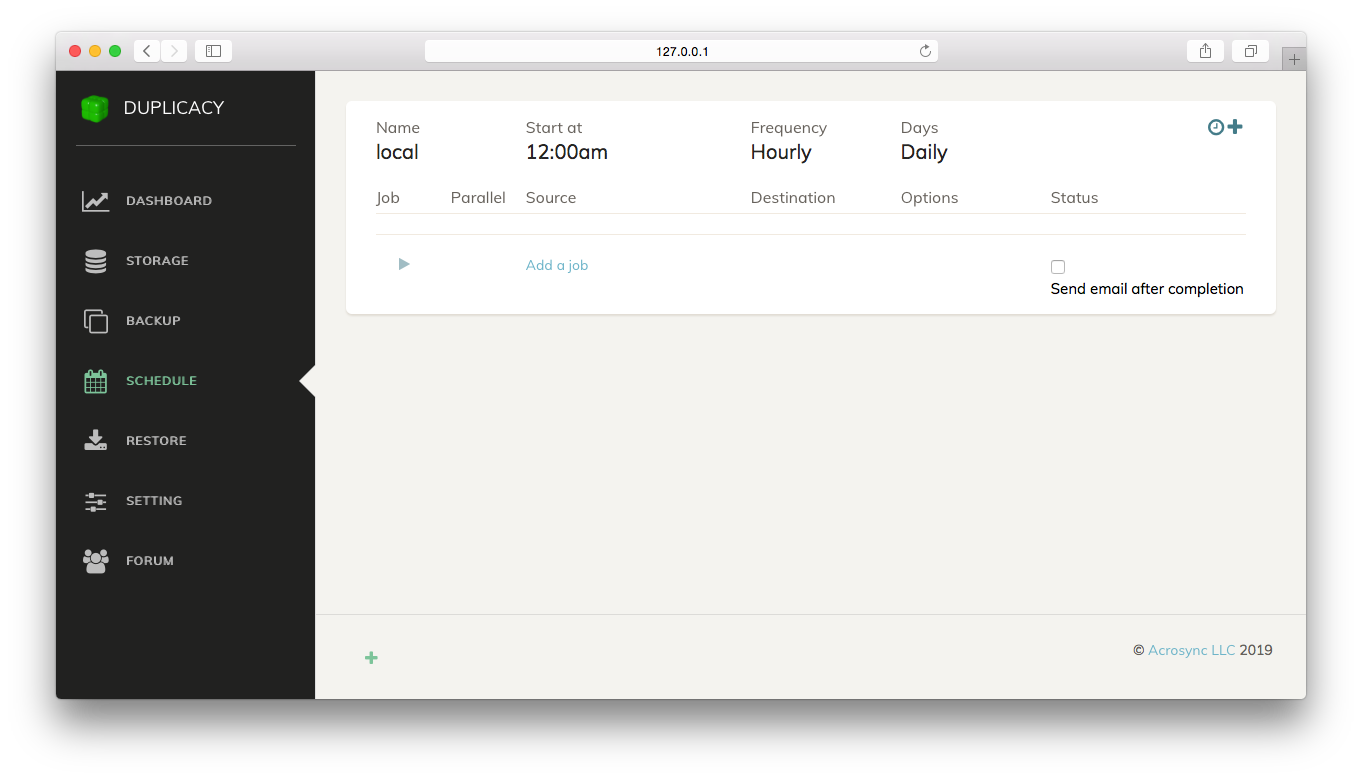
need to create schedules. When you visit the Schedule page, it will ask you to set up a new schedule: This is how it looks after you choose the starting time, the frequency, and the days on which the schedule will run: The schedule doesn't have any jobs yet. You can add new jobs by clicking the Add a job link or the plus sign at the top right corner.
There are 4 types of jobs: backup, check, copy and prune.
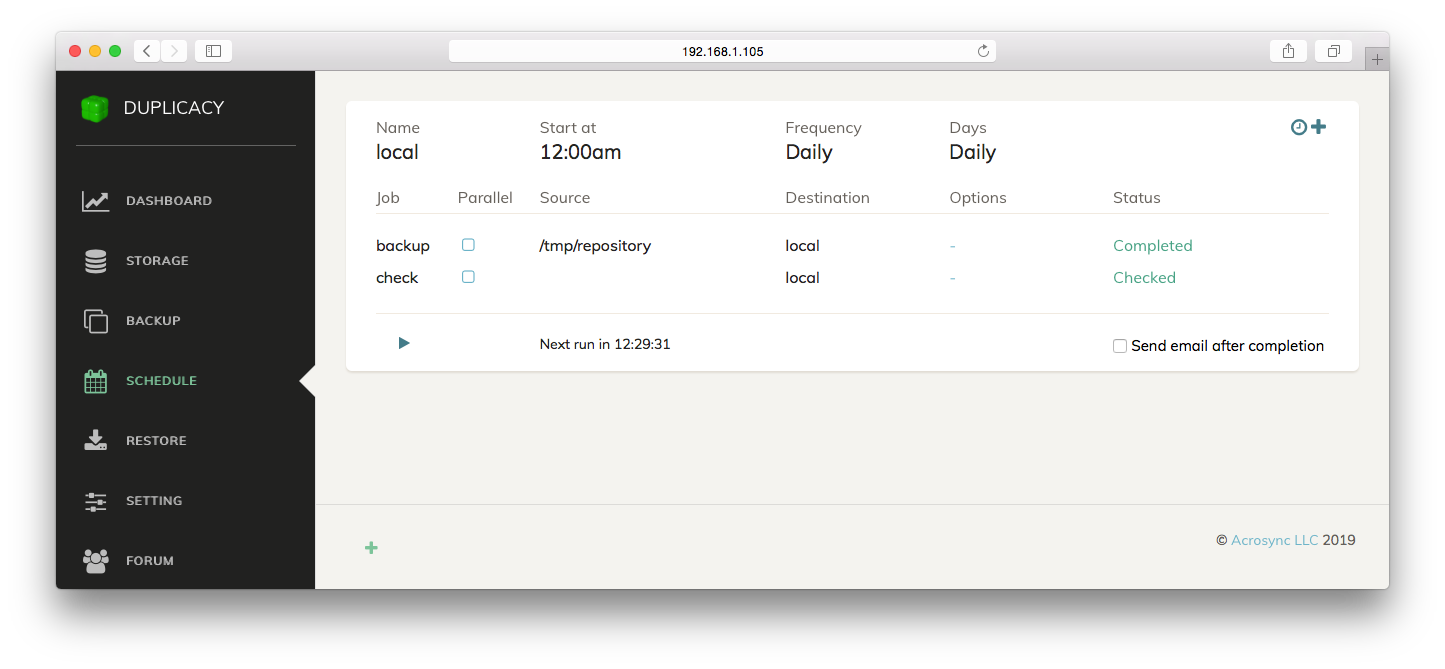
After a job has been added, you can set the execution mode of the job to Parallel. A parallel job will be run at the same time with the previous job if the
previous job is also a parallel job. You can also specify extra options to any job. When you highlight a job by clicking the row, you will be able to reposition the job
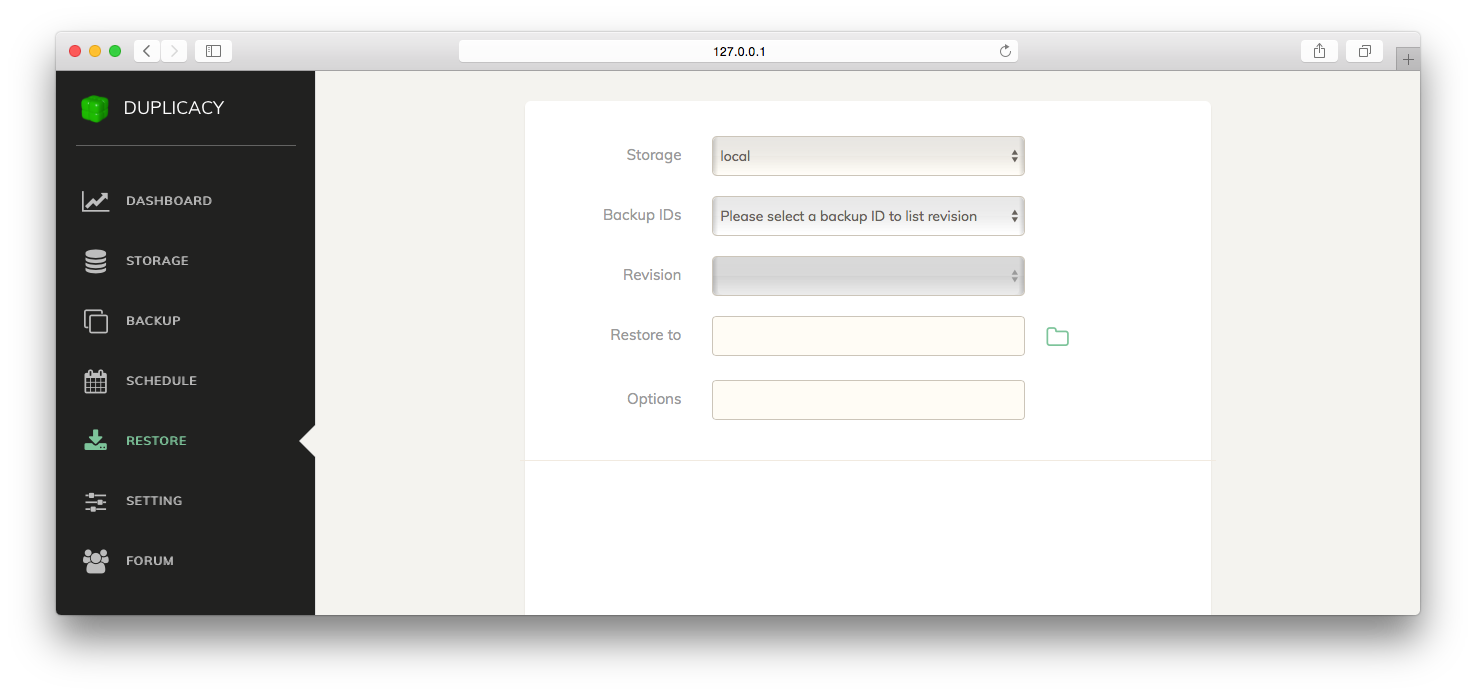
in the list to change the execution order. You may have noticed that there isn't a restore job. To restore files from an existing backup, you'll need to open the Restore page, and manually perform
the restore operation as follows. First, select the storage where the backup resides. Then select the Backup ID of the backup. This Backup ID is what you chose when creating the backup.
After that, select the revision number of the particular backup that you want to restore from. At this time, Duplicacy Web Edition will show the file list contained
in the chosen backup, starting from the root level.
Now you can highlight the file or directory that you want to restore. You can also expand a directory by clicking the directory icon. Finally, select a destination
directory where restored files should go to, and click on the Restore button to start the restore operation.
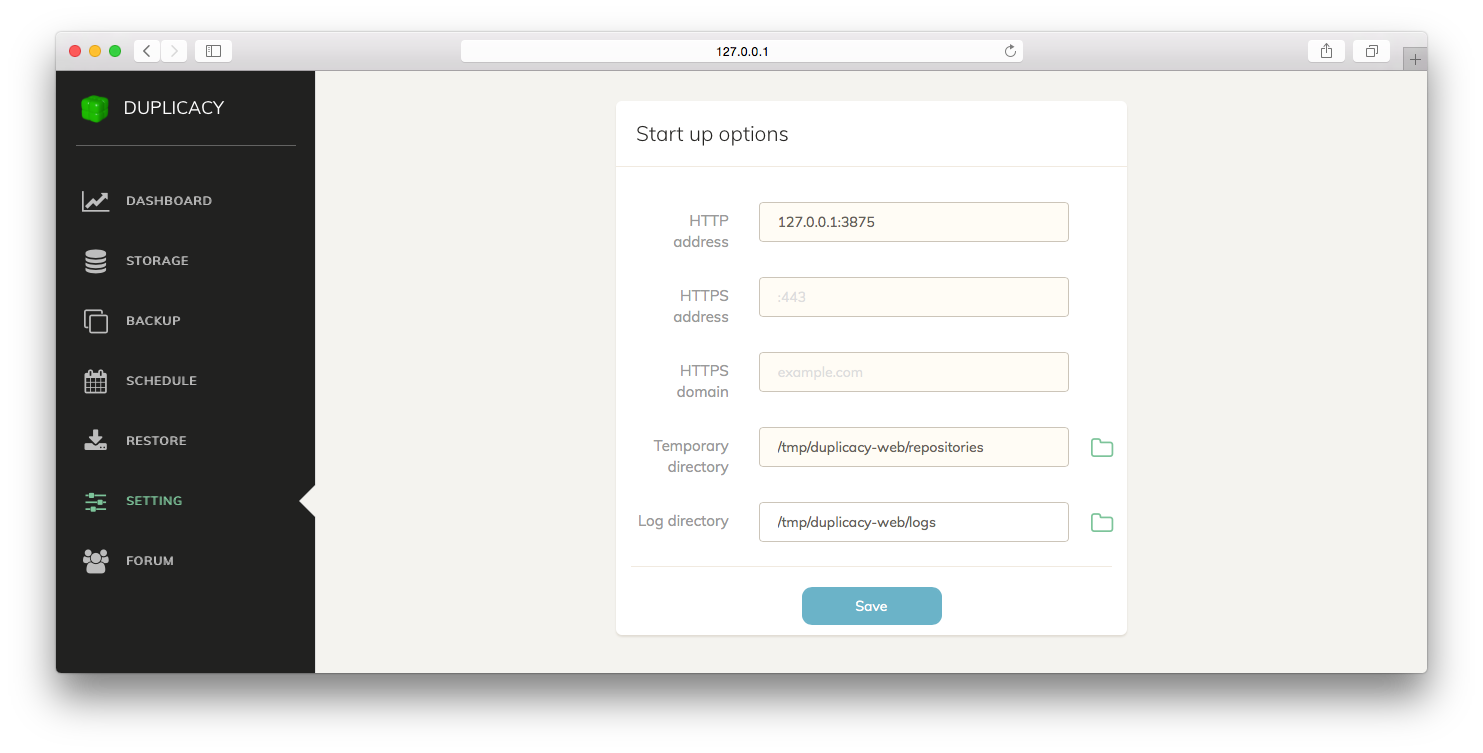
On the Setting page, you can change several options such as the listening address, temporary and log directories, and passwords. By default Duplicacy Web Edition listens on localhost:3875 which means the Web GUI is only accessible from the local computer.
You can change the IP address to the private/public network interface, so that you can visit the Web GUI from a different computer. You can also enable HTTPS by specifying an HTTPS listening address as well as a domain name. Duplicacy Web Edition will automatically
download a certificate from Let's Encrypt. On this page, Temporary Directory is where Duplicacy Web Edition stores configurations on directories to be backed up. A local
cache that enables faster downloads is also placed under this directory which may consume a large amount of disk space if you have many backups. Therefore
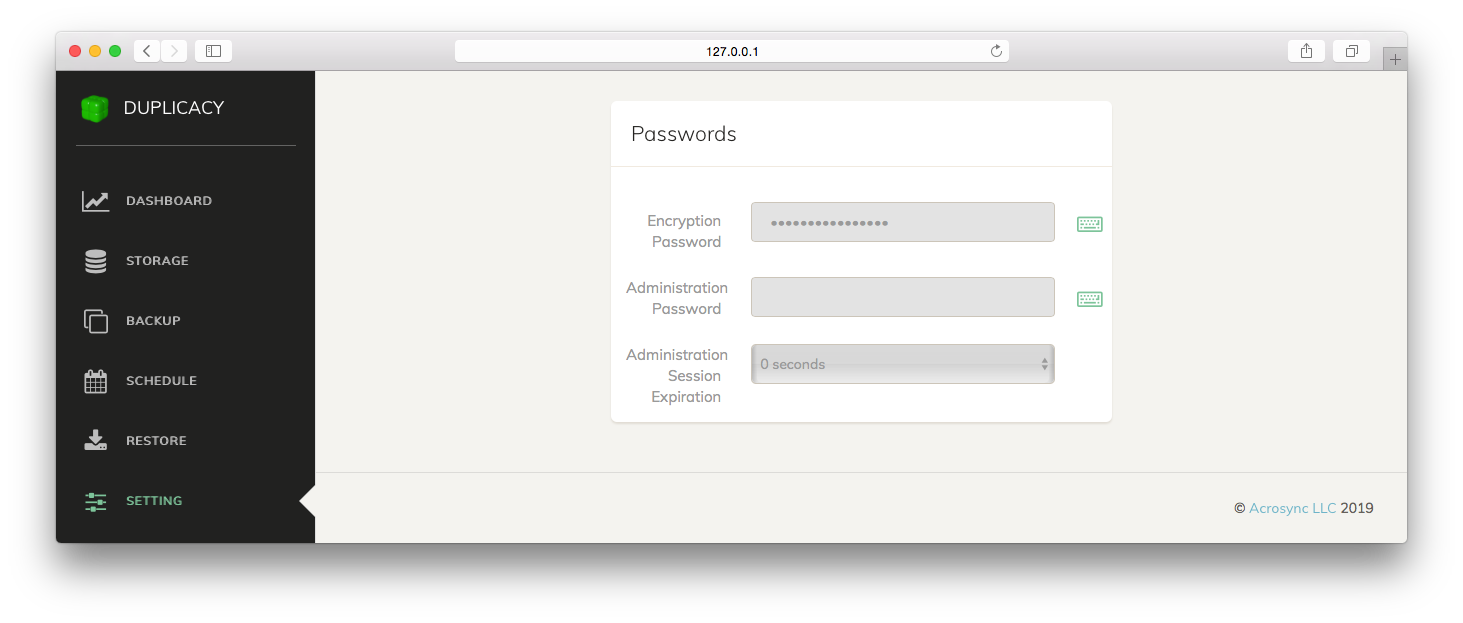
you may consider moving this directory to a non-default location. The Encryption Password is the master password we talked before that is used to encrypt storage-relate credentials.
The Administration Password is the password that you can set so that a user wanting to access any page served by Duplicacy Web Edition will
need to enter this password. You can control how often this password needs to be re-entered by setting the Administration Sessions Expiration time. Starting from version 1.1.0, Duplicacy Web Edition can be installed as a Windows service.
Run the installer in an administrator DOS prompt, select `Install for All Users`, and you'll see the option to install the service at the last step. Or you can run this command in an administrator DOS prompt after the program has been installed: A new service, named `Duplicacy Web Edition`, will be installed and started automatically. You can then open the web browser at `127.0.0.1:3875`. With the service installed you'll find settings and logs under `C:\ProgramData\.duplicacy-web`. To uninstall the service, use the `-uninstall-service` option.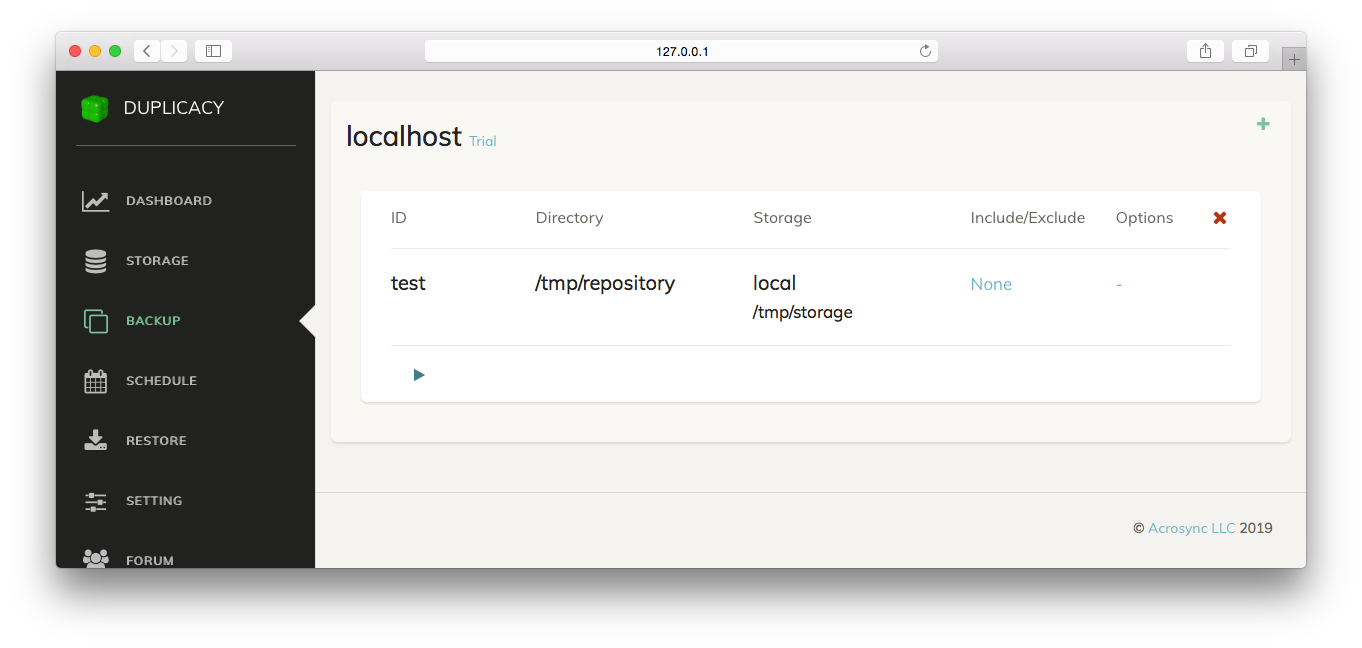
Adding a Schedule
Restore

Setting
Install as Windows Service
\path\to\duplicacy_web_win_x64_1.1.0.exe -install-service
\path\to\duplicacy_web_win_x64_1.1.0.exe -uninstall-service
Command Line Arguments